how to connect Dishwasher Drain to Garbage Disposal
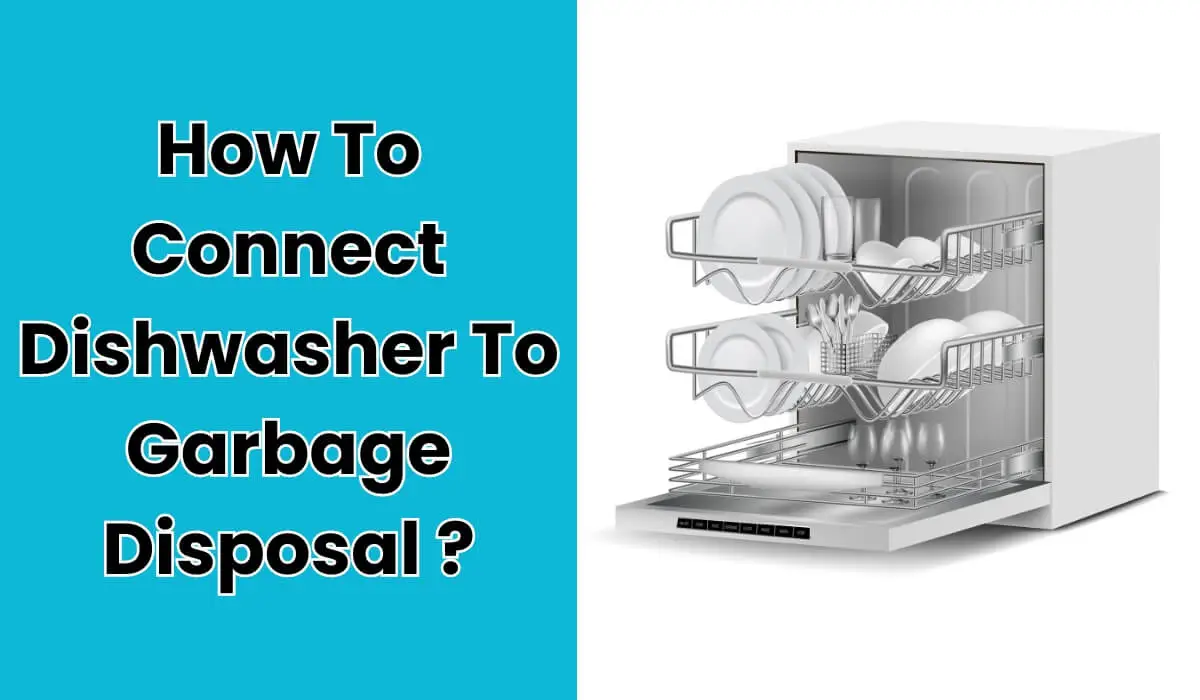
It’s really important to hook up your dishwasher’s drain hose to your garbage disposal the right way. Doing this correctly helps everything in your kitchen plumbing run smoothly, keeps your dishwasher from backing up, and makes sure the dirty water goes where it should—right through the garbage disposal without any messes.
In this guide, we’ll cover all the steps you need to connect your dishwasher drain hose properly. Whether you’re setting up a brand-new dishwasher or fixing up an old one, knowing how to connect it right is key. This can help you avoid water damage and expensive fixes, giving you peace of mind that your kitchen appliances are working right and are safe to use.
What You’ll Need
Before you begin connecting your dishwasher’s drain hose to your garbage disposal, it’s essential to gather all the necessary tools and materials to ensure a smooth and efficient installation process.
Equipment / Tools
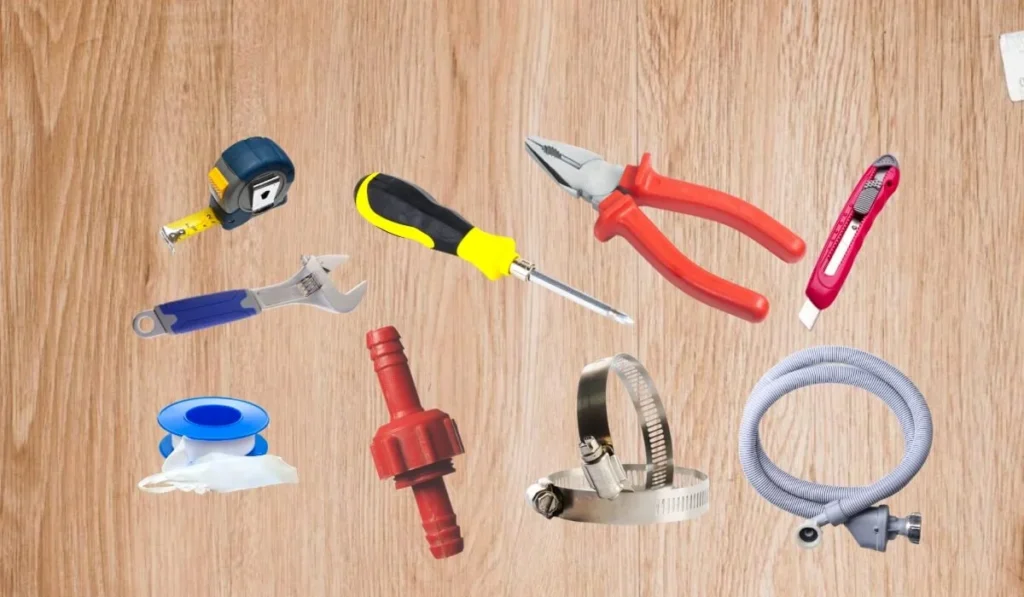
To properly connect your dishwasher drain hose, you will need the following tools:
- Channel-type pliers: These are crucial for adjusting and tightening connections.
- Screwdrivers (Phillips and flat-head): Needed for various screws during the installation.
- Adjustable wrench: Useful for tightening nuts and fittings.
- Utility knife: For any necessary hose trimming.
- Tape measure: To ensure hoses are cut to the correct length.
- Hose clamps: To secure the hose connections.
Make sure you have these tools ready before you start, as they will make the installation easier and help prevent any mid-process trips to the hardware store.
Materials
You will also need the following materials to complete the installation:
- Dishwasher drain hose: This hose will connect your dishwasher to the air gap or directly to the garbage disposal.
- Clamps: To secure the hose in place, ensuring a tight fit and preventing leaks.
- Air gap (if required): This prevents backflow into the dishwasher from the sink.
- Hose adapters: These may be necessary if the hose and the connection points are of different sizes.
- Plumber’s tape: Useful for wrapping threaded connections to enhance sealing.
- Wire clamps: These provide additional security to keep the hose connected tightly.
Preparing for Installation
Before you start connecting your dishwasher’s drain hose to your garbage disposal, it’s important to properly prepare the installation area and take the necessary safety precautions.
Clear the Area: Begin by ensuring that the space under your kitchen sink is completely clear. Remove any household items, cleaning supplies, or other objects. This will give you ample room to work and prevent any accidental water damage to your belongings.
Check for Existing Connections: Examine the area where you will connect the dishwasher drain hose. If there is an old dishwasher or previous connections, make sure to assess whether any existing hardware can be reused or if it needs replacement.
Turn Off Power and Water Supply: Safety first! Always turn off the power to the kitchen sink area and the garbage disposal at your circuit breaker. Additionally, shut off the water supply to prevent any accidental flooding while you work. This is crucial to avoid electrical hazards or water damage.
Gather Your Tools and Materials: With the area cleared and safety measures in place, make sure all the necessary tools and materials are within reach. This will streamline the installation process and prevent any unnecessary interruptions.
Wear Appropriate Safety Gear: It’s advisable to wear safety glasses to protect your eyes from any debris, especially while cutting or adjusting components. Gloves are also recommended to protect your hands from sharp edges and ensure a good grip on your tools.
Drain Connection With Air Gap and Garbage Disposal
Connect Hose to Air Gap
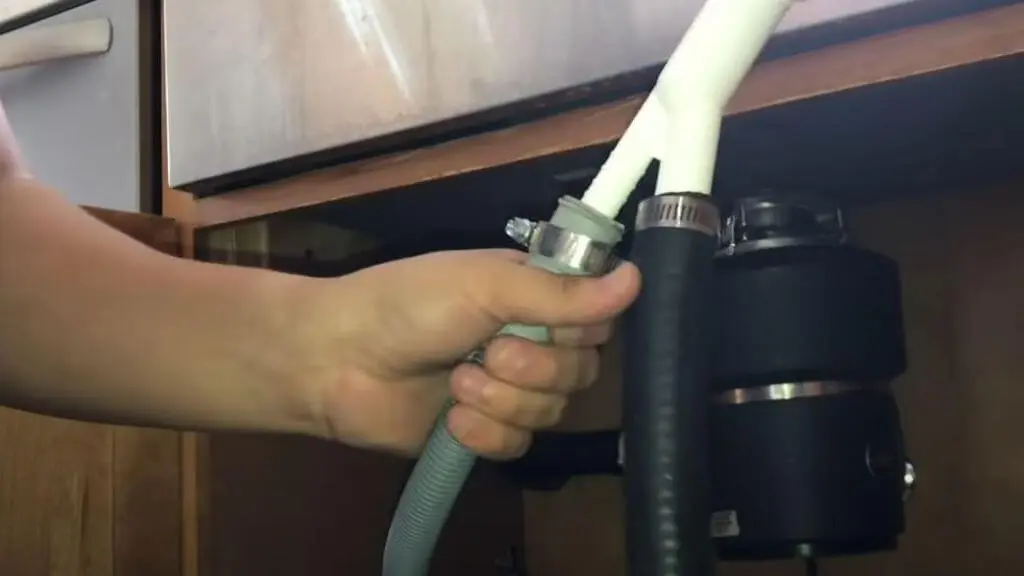
To start connecting your dishwasher’s drain hose with an air gap, first locate the air gap, which is usually installed on the countertop or the kitchen sink. Measure the distance from the dishwasher outlet to the air gap and cut the drain hose to fit this length, ensuring it fits snugly without any kinks or excessive looping. Then, slide one end of the hose over the smaller of the two stubs on the air gap and secure this connection with a hose clamp to prevent any leaks. Tighten the clamp with a screwdriver or pliers until it is firmly in place.
Connect Hose to Garbage Disposal
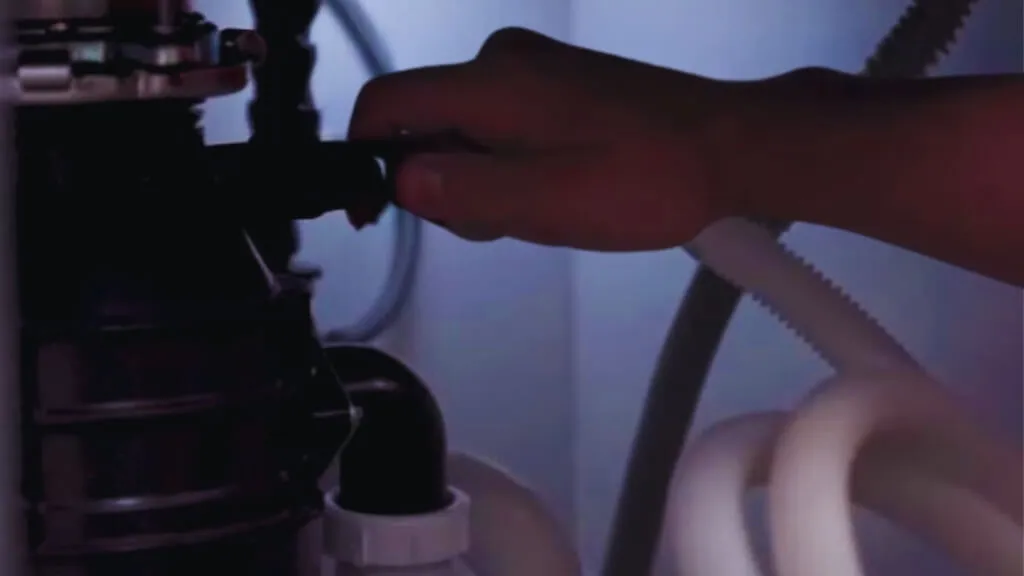
Once the hose is connected to the air gap, the next step is to connect it to the garbage disposal. Start by preparing the disposal inlet; if this is the first time a dishwasher is being connected to your disposal, you will need to remove the knockout plug from the dishwasher inlet using a hammer and screwdriver. Next, measure the distance from the air gap to the disposal inlet and trim the hose accordingly to avoid any excess length that could cause sagging or create kinks. Attach the trimmed end of the hose to the inlet on the garbage disposal and secure it with another hose clamp to ensure a tight seal and prevent leaks.
Warning
When installing the dishwasher drain hose, be aware of these potential issues and how to avoid them:
- Avoid Tight Bends: Ensure the hose does not bend sharply, as this can restrict water flow and lead to clogs. Maintain a gentle curve in the hose’s path.
- Secure All Connections: Double-check all clamps and connections to ensure they are tight and secure. Loose connections can lead to leaks and water damage under your sink.
- Check for Leaks: After installation, run the dishwasher on a short cycle while observing the connections. Any sign of dripping or leakage should be addressed immediately by tightening clamps or adjusting the hose layout.
For Disposal Installation: How To Install A Garbage Disposal
Drain Connection With Air Gap (But No Garbage Disposal)
Connect Hose to Air Gap

When connecting a dishwasher drain hose to an air gap without a garbage disposal, again begin by locating the air gap, typically mounted on the sink or the countertop. Measure the distance from your dishwasher’s output to the air gap to determine the necessary length of the drain hose. Cut the hose to this specific length, ensuring a perfect fit that avoids any slack or sharp bends. Slide one end of the hose onto the smaller stub of the air gap and use a hose clamp to secure this connection. Tighten the clamp firmly with a screwdriver or pliers to prevent any potential leaks.
Connect Hose to Drain Pipe

Next, you need to connect the other end of the hose from the air gap directly to the kitchen’s main drain pipe. Measure the distance between the air gap and the drain pipe to ensure the hose is cut to the appropriate length, allowing for a smooth path without unnecessary loops or kinks. Attach the hose to the drain pipe inlet, usually located beneath the sink. It may be necessary to use an adapter if the hose and the inlet sizes do not match. Secure this connection with another hose clamp, ensuring it is tight and leak-free.
Secure With Hose Clamps

To ensure all connections remain secure and to prevent any future leaks, double-check each hose clamp involved in the setup. Tighten each clamp around both the air gap and the drain pipe connections. A good practice is to tug gently on the hoses after securing them to test their firmness and ensure they are not loose. Properly securing these connections is crucial for maintaining the integrity of your plumbing and avoiding water damage or backflow issues in your kitchen.
Drain Connection Using High Loop to Garbage Disposal
Prepare the Drain Hose
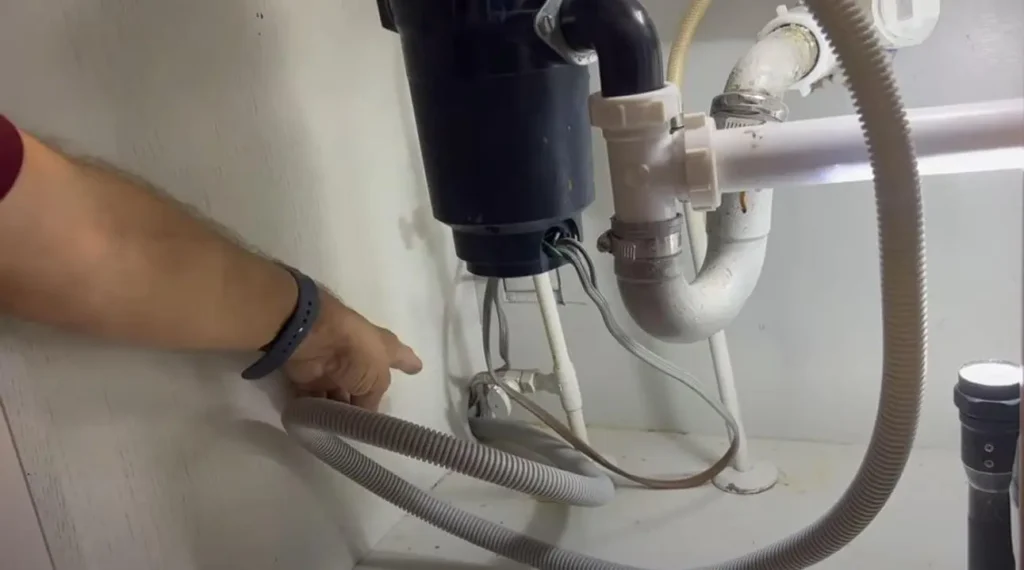
Preparing the drain hose properly is the first crucial step when setting up a high loop connection to your garbage disposal. Start by ensuring that the dishwasher drain hose is long enough to reach the garbage disposal with some extra length for looping. If necessary, extend the hose using a compatible extension and secure it with hose clamps. Clear any debris or residue inside the hose to avoid clogging and ensure smooth water flow. It’s also a good practice to lay out the hose along the intended path to pre-form it, which will make the looping process smoother.
Loop the Drain Hose
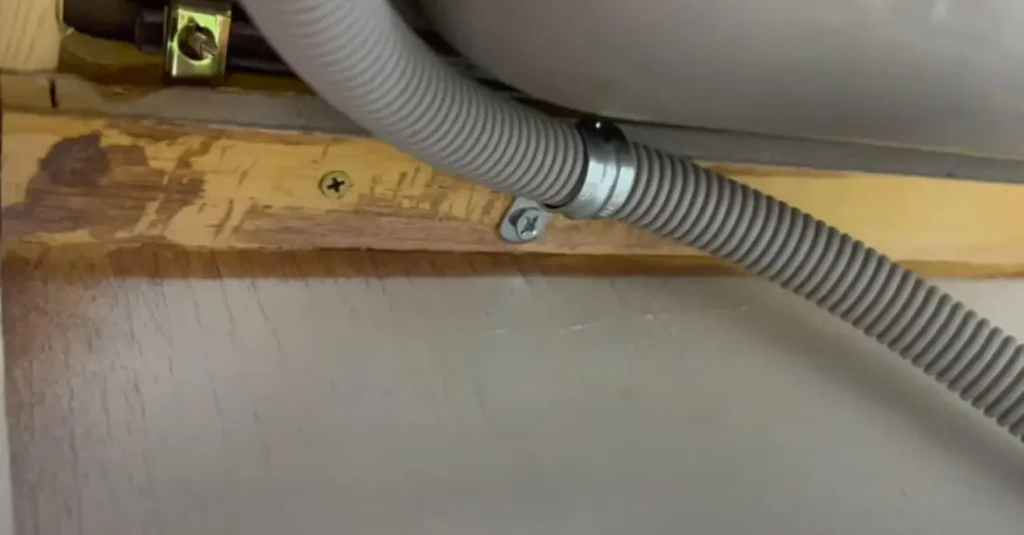
Creating a high loop with the drain hose is essential as it prevents backflow from the sink into the dishwasher. To form a high loop, elevate the hose as high as possible under the kitchen sink — ideally, the top of the loop should be at least 18 inches above the floor or higher than the connection point on the garbage disposal. Secure the loop in place using a clamp or ties attached to the underside of the countertop or sink base. This positioning helps ensure that any water that runs back down the hose will go into the sink drain or disposal rather than the dishwasher.
Connect the Hose to disposal

With the high loop formed, the final step is to connect the hose to the garbage disposal. Guide the end of the hose from the high loop down towards the dishwasher inlet on the disposal. If the hose seems too long, measure the needed length, cut the excess with a utility knife, and ensure a clean, straight cut for a secure fit. Slide the hose over the inlet fitting on the garbage disposal and secure it firmly with a hose clamp. Double-check that the clamp is tight and the hose fits snugly to prevent leaks. After the connection is made, it’s a good idea to run a test by running water through the system to check for any signs of leakage and ensure everything is set up correctly.
Attach Hose to Sink Drain
After forming the high loop, the next step is to connect the hose end to the sink drain. First, check if an adapter is needed to fit the hose to your sink drain connection point, as compatibility can vary. Slide the end of the hose onto the Y-branch tailpiece on your drain or any adapter. Use a hose clamp to make this connection secure, tightening it enough to ensure a firm hold but not so much that the hose is crushed or damaged. This connection should be leak-free and stable, critical for preventing issues during operation.
Testing and Troubleshooting
Once your dishwasher’s drain hose is connected with a high loop directly to the sink drain, it’s time to test the installation:
- Run Water: Turn on the dishwasher and allow it to run a short cycle. Monitor the connections, especially at the high loop and sink drain, for any signs of leaking.
- Check Connections: If you notice any drips or moisture, tighten the hose clamps further or readjust the hose to eliminate any gaps or misalignments.
- Observe Flow: Ensure that water flows smoothly without any backups or overflow. Listen for unusual noises that could indicate a blockage or incorrect installation.
- Repeat Testing: It might be beneficial to run a few cycles to ensure consistent performance without leaks or other issues.
FAQ’s
The Author

I’m Muhammad Nabeel Dar, an employee in waste management and the owner of Garbage Waste Disposal with more than four years of experience helping people to control waste and garbage disposals are the best tools to control it. Read more
