How to Install a Garbage Disposal
Installing a garbage disposal might seem intimidating at first, but it’s actually one of the most rewarding DIY projects you can take on in your kitchen. Whether you’re replacing an old unit or adding one for the first time, you can get it done in a couple of hours with some basic tools and patience.
This guide will walk you through everything from preparation to wiring, mounting, and leak testing, so you can install your garbage disposal confidently, even if you’ve never done it before.
Tools and Materials You’ll Need
Before starting, make sure you’ve gathered everything you’ll need to get the job done smoothly.
Essential Tools:
- Plumber’s putty (for sealing the sink flange)
- Wire nuts and electrical tape
- Hammer and screwdriver (both flathead and Phillips)
- Channel-lock pliers or adjustable wrench
- Pipe wrench
- Flashlight (for better visibility under the sink)
Optional (depending on your setup):
- Hacksaw (if pipes need trimming)
- Electrical cord kit (if your unit doesn’t include one)
- Dishwasher connector kit (if you’re connecting a dishwasher)
Safety Gear:
Wear gloves and safety glasses, and always make sure your workspace is dry. Check that your home’s electrical setup supports a disposal unit, especially if you’re using a septic system.
Step-by-Step Installation Guide for a Garbage Disposal
Here is a full how-to guide on installing a garbage disposal:
Step 1: Turn Off Power and Prepare the Area
Safety comes first! Head to your breaker box and switch off the power to your kitchen sink area. This step is crucial to prevent any electric shock while handling the disposal’s wiring.
Next, clear everything out from under your sink. Keep a bucket or shallow pan underneath to catch any water that may drip when you disconnect old plumbing. Having a towel nearby also helps.
Step 2: Remove the Old Disposal (If You Have One)
If you’re replacing an existing disposal, start by disconnecting it from power. If it’s plugged in, unplug it. If it’s hardwired, turn off the circuit breaker and confirm no power is running by flipping the wall switch the disposal should stay silent.
Now, disconnect the drainpipes using a wrench or pliers. Remove the P-trap (the curved drainpipe) and any extensions leading to the main drain. If your dishwasher drains through the disposal, remove that hose as well.
Finally, loosen the large retaining ring under the sink and carefully lower the old disposal. Remove the old sink flange and scrape away any dried plumber’s putty to get a clean surface.
Step 3: Install the New Sink Flange
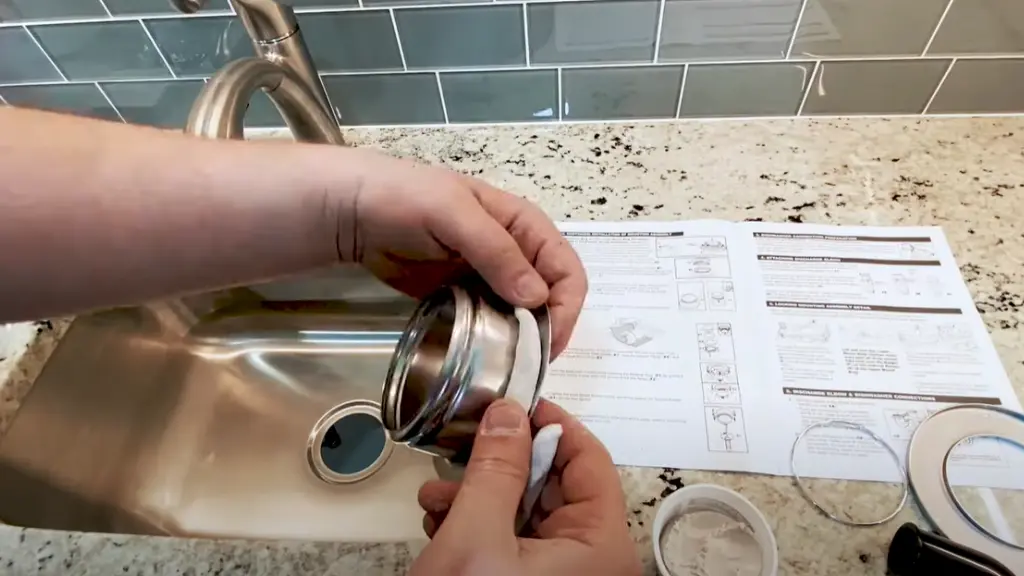
Take a small amount of plumber’s putty, roll it into a rope shape, and press it under the lip of the new sink flange. This creates a watertight seal between the flange and your sink.
Insert the flange into the drain hole from above and press it down firmly. You can place a small weight like the disposal itself on top to help hold it in place while you work underneath.
Step 4: Attach the Mounting Assembly
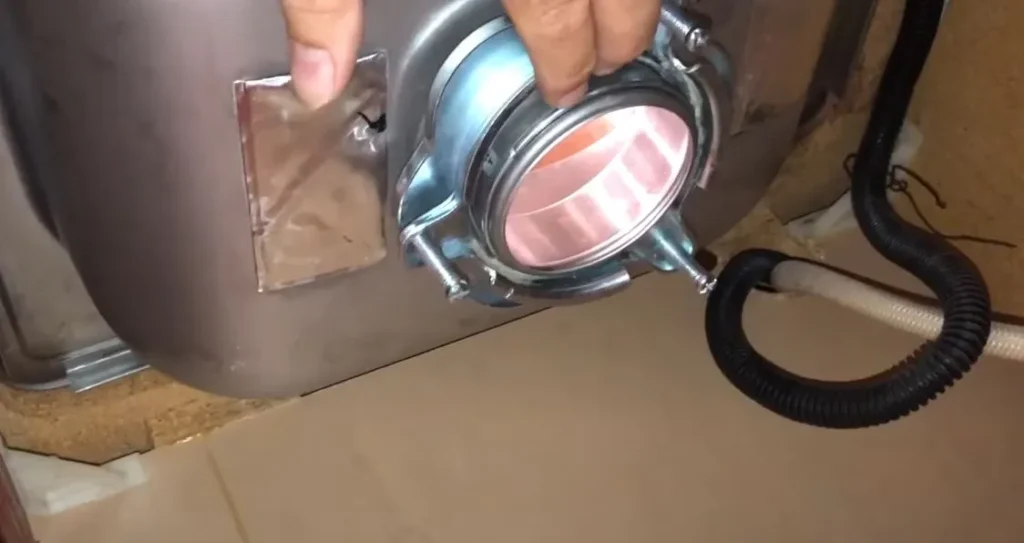
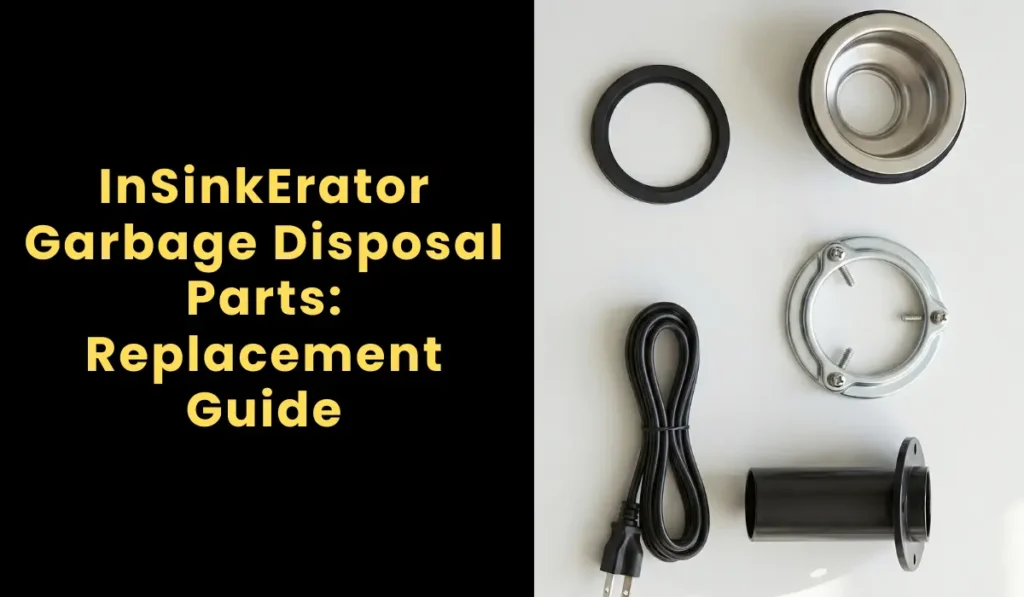
From below the sink, slide the fiber gasket, backup flange, and mounting ring onto the sink flange in that order. Tighten the mounting ring screws evenly by alternating sides. This ensures a snug fit without warping the seal.
Don’t overtighten, a firm fit is enough. If the ring looks tilted or uneven, loosen it slightly, realign, and retighten.
Step 5: Tighten the Mounting Ring Assembly
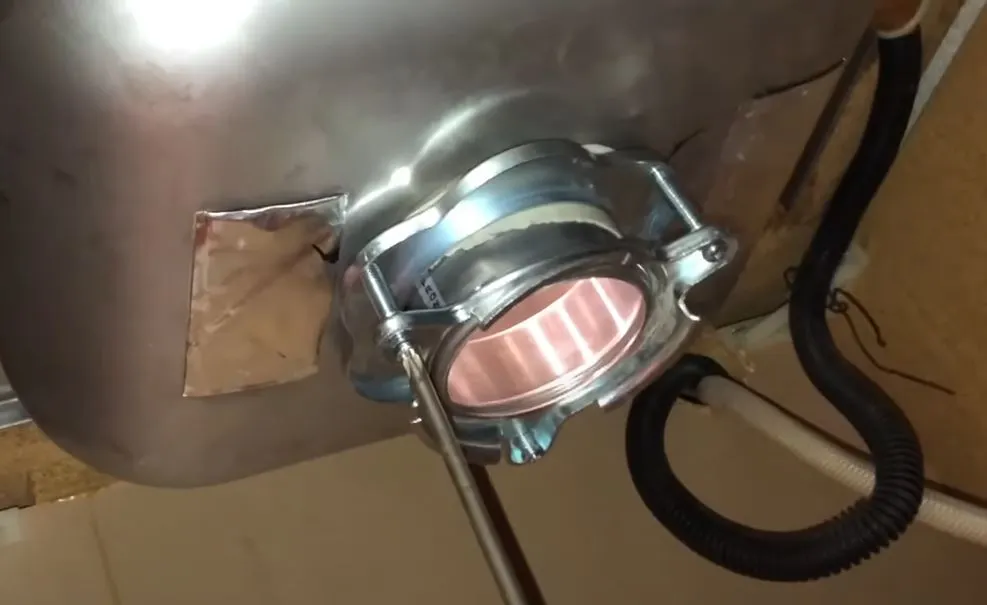
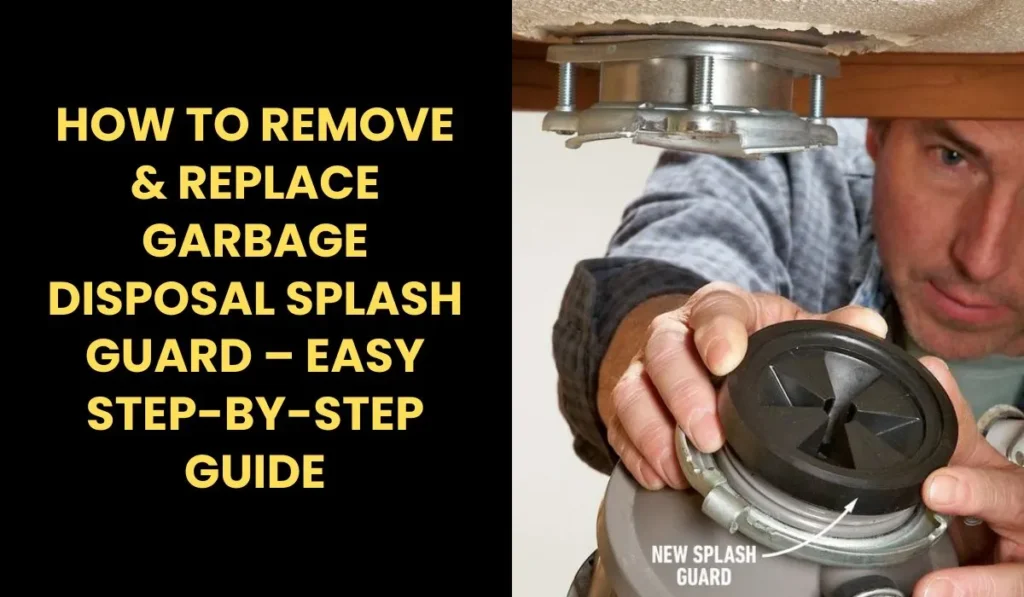
Once the mounting ring and drain fitting are properly positioned, focus on tightening the assembly evenly. Rotate the mounting ring until it feels snug against the underside of the sink, his secures the disposal in place without any wobble. Work slowly and evenly around the ring, tightening each side a little at a time to maintain balanced pressure. This helps prevent the ring from sitting unevenly or becoming misaligned during installation.
If the ring doesn’t tighten smoothly or the disposal feels loose, check for obstructions like leftover debris, plumber’s putty, or old hardware pieces that may be preventing a clean connection. Make sure all surfaces are flush and clean before re tightening. A secure, level fit ensures your disposal operates quietly and leak-free once installed.
Step 6: Prepare the Dishwasher Connection (If Needed)
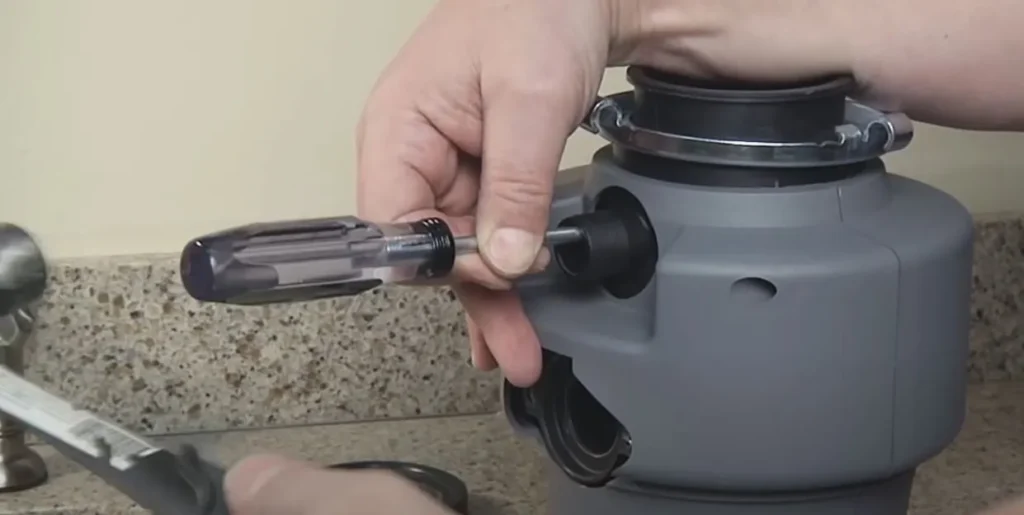
If your kitchen has a dishwasher, most disposals include a small plug inside the dishwasher inlet that must be removed before connecting the hose.
Lay the new disposal on its side. Use a screwdriver and light tap from a hammer to knock out the plastic plug. Shake the disposal gently to remove the loose piece from inside, then you’re ready to connect the dishwasher hose later.
Step 7: Wire the Garbage Disposal
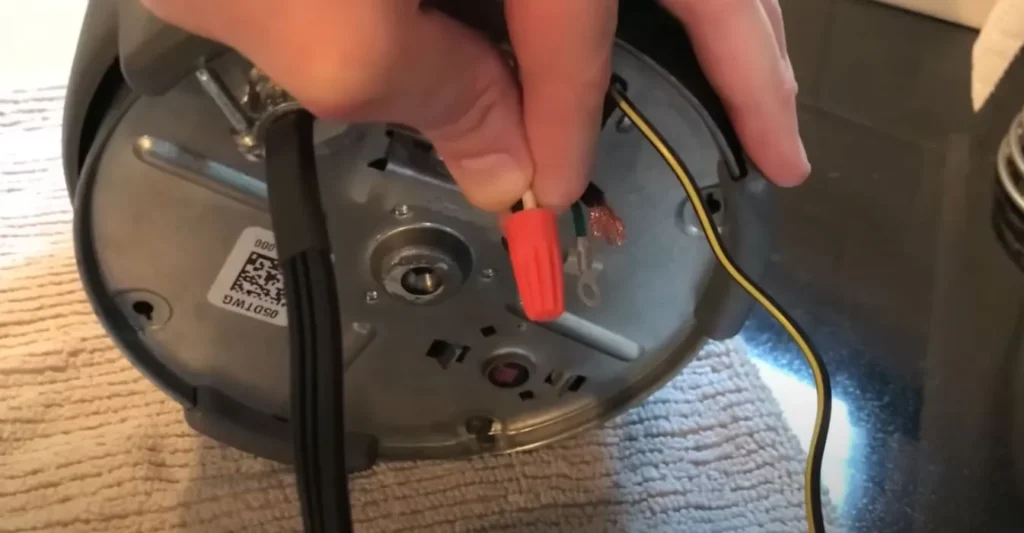
Most disposals either plug into an outlet or are hardwired. If yours includes a power cord, skip to the next step.
To wire it manually:
- Remove the electrical cover plate on the disposal’s underside.
- Feed the power cable through the clamp hole.
- Connect black to black (hot), white to white (neutral), and green or bare wire to the ground screw.
- Secure connections with wire nuts and gently tuck the wires back inside.
- Replace the cover plate.
Step 8: Mount the Garbage Disposal
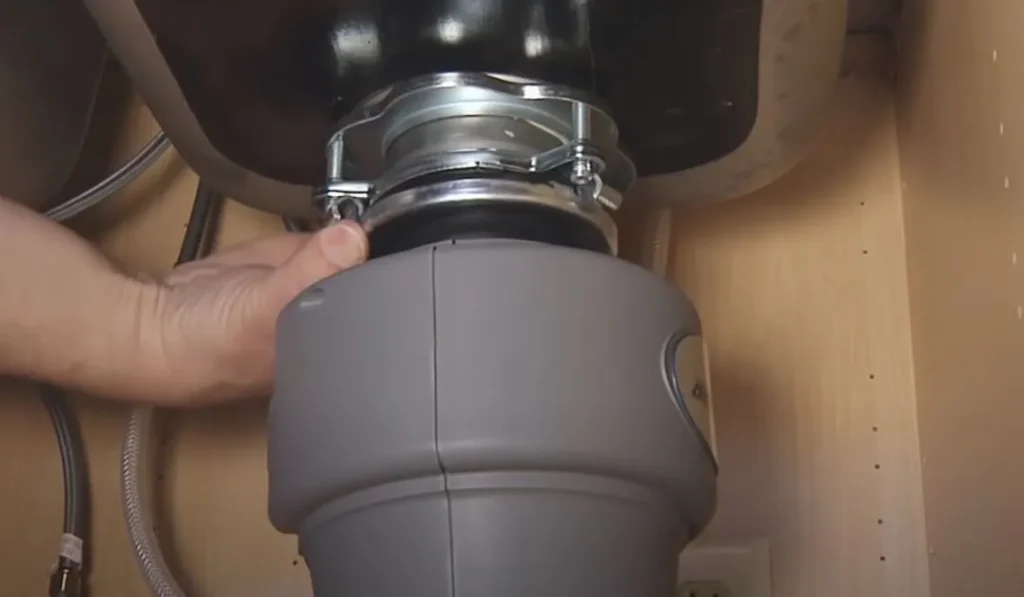
Align the disposal’s three mounting tabs with the slots on the mounting ring beneath your sink. Push the unit upward and twist clockwise until you feel it lock into place. Use a screwdriver or the provided wrench to tighten the locking ring if needed.
The unit should now feel solid — no wobbling or movement when you nudge it.
Step 9: Connect the Drain Lines
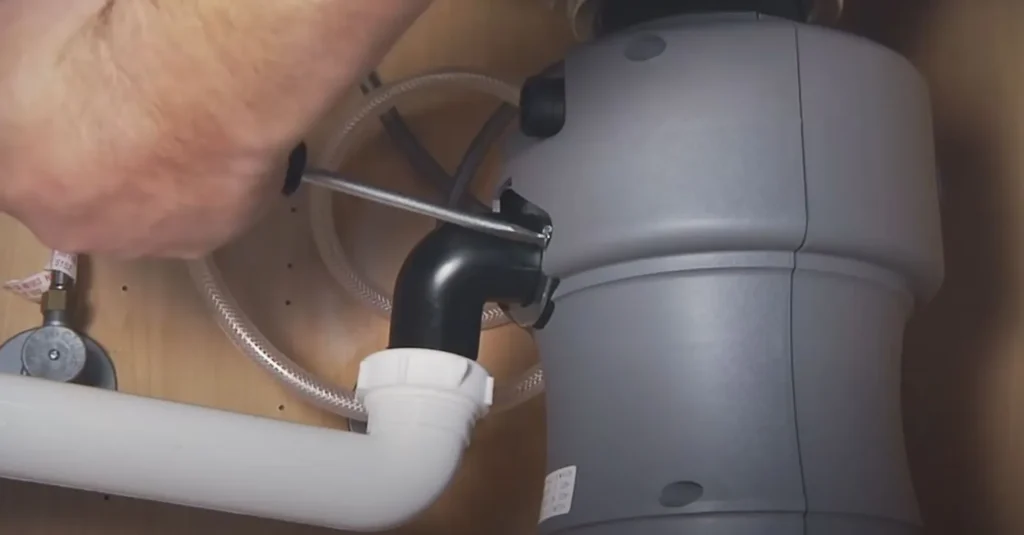
Attach the discharge elbow and rubber gasket to the disposal’s outlet. Then connect the discharge tube leading to your P-trap. If it’s too long, trim it; if too short, use an extension pipe.
Tighten all the clamps and slip nuts by hand first, then give them a gentle turn with your wrench. Avoid overtightening — that can crack plastic fittings.
Step 10: Connect the Dishwasher Hose (Optional)
If you removed the dishwasher plug earlier, slide the dishwasher drain hose onto the inlet and secure it with a hose clamp. Ensure it’s snug but not overly tight. If your setup includes an air gap (a small fixture on your sink deck), connect the hose through it according to your dishwasher’s manual.
Step 11: Final Checks and Leak Test
Before powering on, double check every connection — electrical, drain, and flange. Wipe away any extra plumber’s putty around the sink opening.
Now restore power at the breaker (or plug in the unit). Turn on cold water and flip the switch to test the disposal. It should run smoothly without leaks or unusual noise. If you notice dripping, tighten the affected connection gently.
And that’s it: you’ve successfully installed your garbage disposal!
Keep the sink stopper in when not using it to prevent utensils or small objects from falling inside. Avoid disposing of glass, metal, bones, or fibrous foods like corn husks to prolong your unit’s life.
Below is attached a useful video of installing a garbage garbage – A complete A to Z process:
Further Reading:
What is a Garbage Disposal? The Ultimate Guide
What Is a Hex Key and How to Use It
Dishwasher Air Gap Installation: A How-To Guide
What is Garbage Disposal Air Switch, Installation and Complete Guide
conclusion
So, installing a garbage disposal may seem daunting at first, but with the right tools, careful preparation, and a little patience, even beginners can handle it confidently. Always remember to cut the power before starting, check for leaks after installation, and use plenty of cold water whenever the unit is running to keep it working efficiently. Once installed, make it a habit to run the disposal regularly to prevent buildup and unwanted odors.
A little care and maintenance will go a long way in ensuring your disposal stays in great shape, keeping your kitchen cleaner, fresher, and more convenient every day.
The Author

Muhammad Nabeel Dar has worked in the waste management industry for over 10 years, specializing in residential waste systems and kitchen efficiency solutions. He writes about practical home improvements, cost-effective appliance choices, and sustainable waste management practices that help homeowners make informed decisions. His hands-on experience with both commercial and residential waste systems provides unique insights into what actually works well in real-world home environments versus what just sounds good in marketing materials.
