
How to Install a Garbage Disposal
Installing a garbage disposal is a straightforward DIY project that usually takes 1–2 hours with basic tools. If you’re replacing an existing unit with the same mount type, the process is even quicker since most of the plumbing and connections are already in place.
If you’re wondering how to install a garbage disposal for the first time, don’t worry—it’s more about following the right steps than having advanced skills. This guide walks you through both new installations and replacements, so you can get the job done safely and correctly without unnecessary hassle.
Tools and Materials
- Plumber’s putty
- Screwdriver (flathead and Phillips)
- Adjustable wrench or channel-lock pliers
- Wire nuts and electrical tape
- Flashlight
- Bucket and towels (to catch water)
- Power cord kit (if your disposal does not include one)
- Dishwasher connector kit (if connecting a dishwasher)
Step-by-Step Installation Guide for a Garbage Disposal
Here is a full guide on how to install a garbage disposal:
Step 1: Turn Off Power and Clear the Area
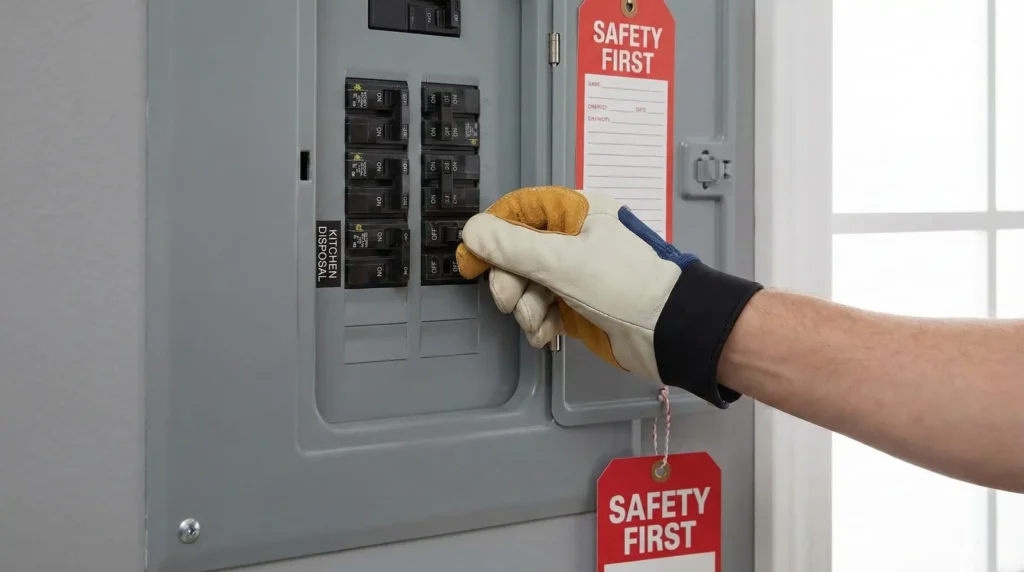
Go to your breaker box and switch off the circuit that powers the disposal or kitchen outlet. Confirm power is off by testing the switch. Clear everything from under the sink and place a bucket below to catch water during disconnection.
Step 2: Remove the Old Disposal (If Replacing)
If replacing an existing unit:
- Scrape off old plumber’s putty from the sink opening
- Disconnect the power cord (unplug or disconnect wires at the junction box)
- Disconnect the dishwasher drain hose (if connected)
- Remove the discharge pipe from the disposal outlet
- Twist the disposal counterclockwise to release it from the mounting ring
- Remove the old mounting assembly and sink flange
Step 3: Install the Sink Flange
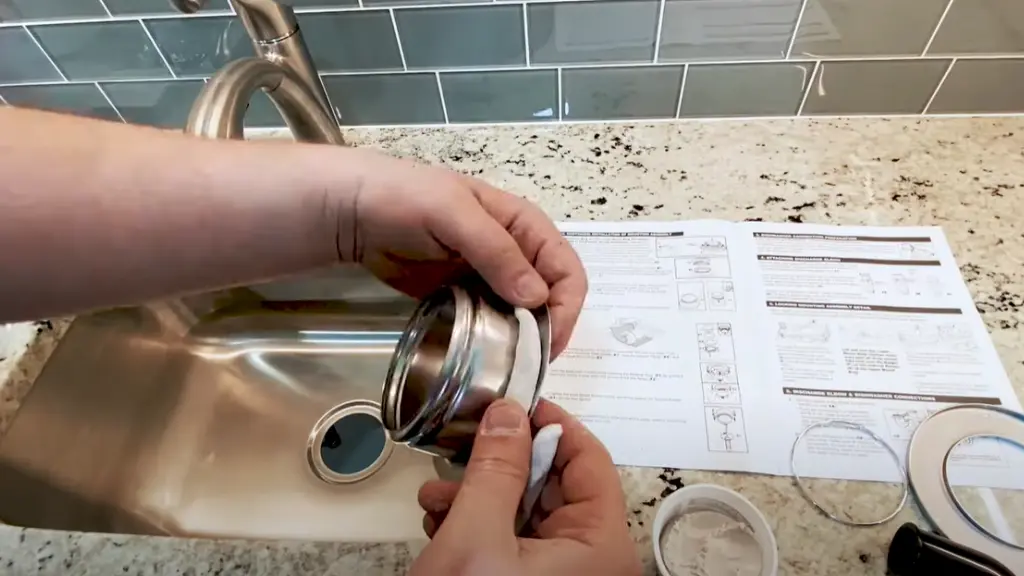
Roll plumber’s putty into a rope and press it under the lip of the new sink flange. Insert the flange into the drain hole from above and press down firmly. Place a weight on top (the disposal itself works) to hold it while you work underneath.
Step 4: Attach the Mounting Assembly
From under the sink, slide the fiber gasket, backup flange, and mounting ring onto the sink flange in that order. Tighten the mounting screws evenly — alternate sides to keep even pressure. Tighten until snug. Do not overtighten.
Step 5: Knock Out the Dishwasher Plug (If Needed)
If connecting a dishwasher, lay the disposal on its side. Use a screwdriver and hammer to tap out the plastic knockout plug inside the dishwasher inlet. Shake the disposal to remove the loose plug piece from inside.
Skip this step if you are not connecting a dishwasher. Leaving the plug in place is correct when no dishwasher connection is needed.
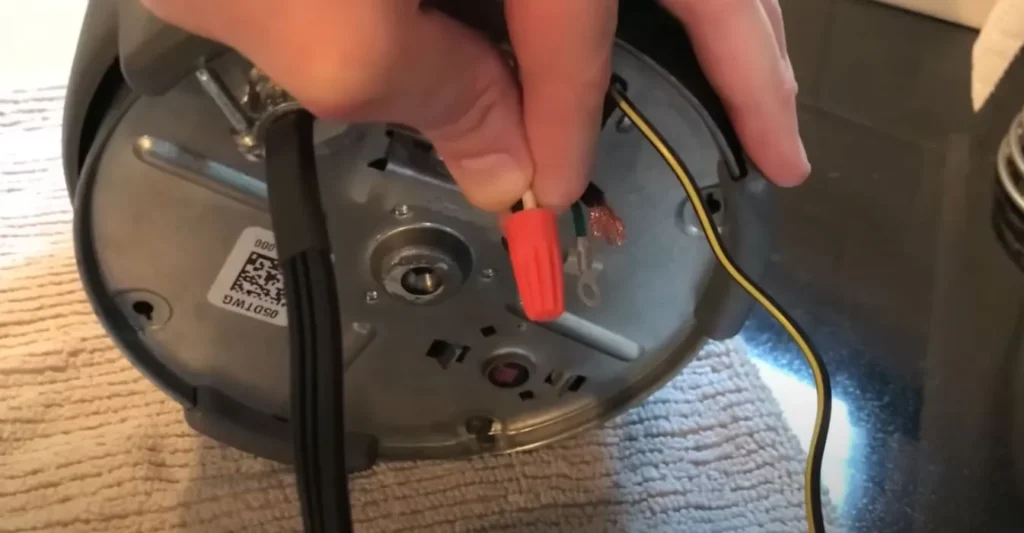
Step 6: Wire the Garbage Disposal
If your disposal includes a pre-installed power cord, skip to Step 7.
For disposals without a cord (most InSinkErator models):
- Remove the electrical cover plate on the bottom of the disposal
- Feed the power cable through the cord clamp and tighten
- Connect black wire to black wire (hot)
- Connect white wire to white wire (neutral)
- Connect green or bare wire to the green ground screw
- Secure each connection with wire nuts
- Tuck wires into the compartment and replace the cover plate
For detailed wiring instructions, read our garbage disposal wiring guide. If you are unsure about electrical work, hire a licensed electrician.
Step 7: Mount the Garbage Disposal
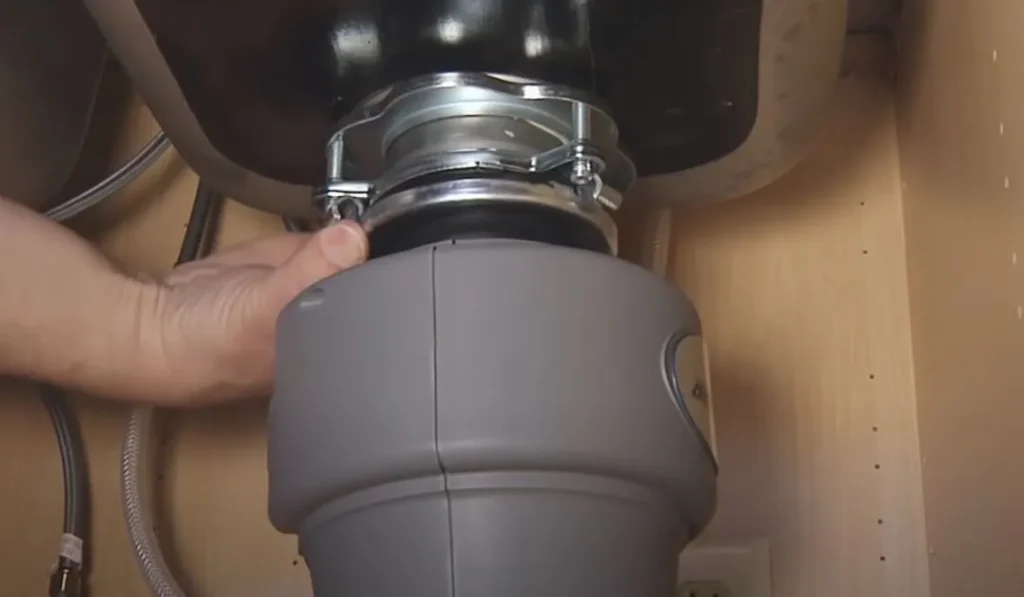
Align the disposal’s mounting tabs with the slots on the mounting ring. Push up and twist clockwise until it clicks and locks into place. Use the included wrench to tighten the locking ring if needed. The unit should feel solid with no wobble.
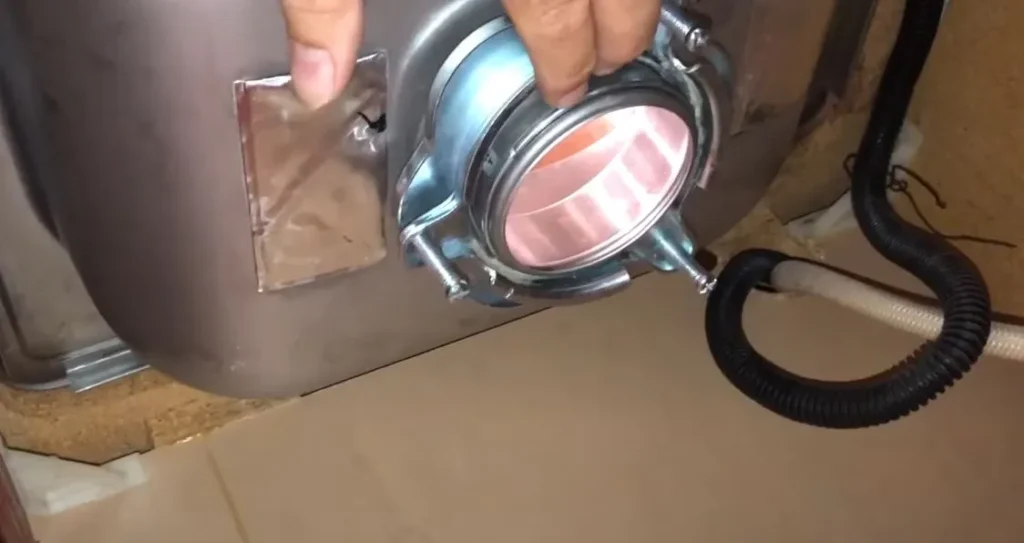
Step 8: Connect the Drain Lines
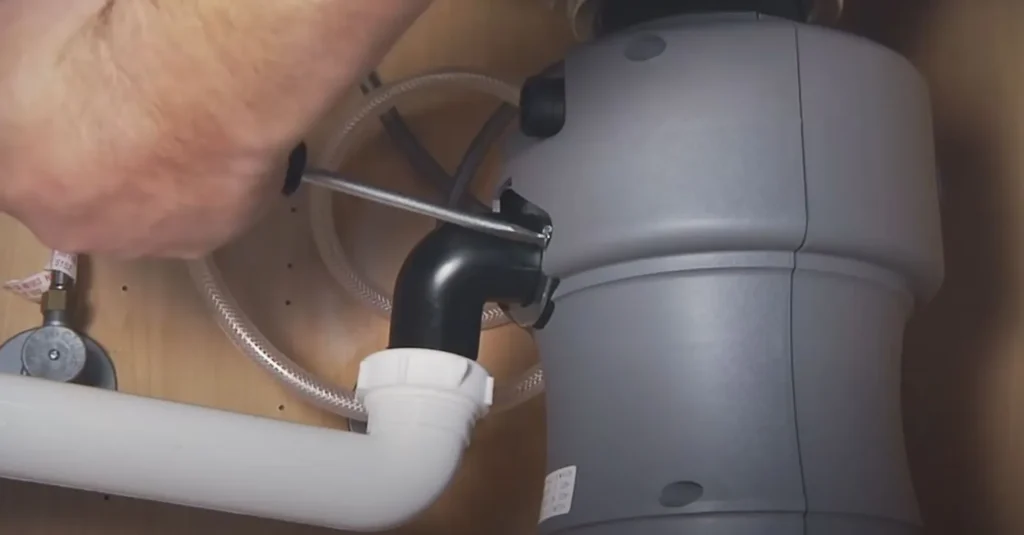
Attach the rubber gasket and discharge elbow to the disposal’s outlet. Connect the discharge tube to your P-trap. If the tube is too long, trim it with a hacksaw. Tighten all slip nuts hand-tight first, then snug them with a wrench. Do not overtighten plastic fittings.
Step 9: Connect the Dishwasher Hose (Optional)
Slide the dishwasher drain hose onto the disposal’s dishwasher inlet and secure with a hose clamp. If your setup includes an air gap, route the hose through it per your dishwasher’s manual.
Step 10: Test for Leaks
- Wipe away excess plumber’s putty around the sink flange
- Turn the water on and check every connection for drips
- Restore power at the breaker
- Plug in the disposal (or confirm the hardwire connection)
- Run cold water and flip the switch to test
- Listen for smooth operation — no grinding, clicking, or vibration
- Check under the sink again for any leaks during operation
If you hear humming but the disposal does not spin, see our humming disposal troubleshooting guide.
conclusion
Installing a garbage disposal is a manageable DIY project for anyone comfortable with basic plumbing. The key steps: power off first, mount securely, wire correctly, and test thoroughly before regular use. If electrical work is needed beyond simple plug-in, bring in a licensed electrician.
FAQ’s
The Author

Muhammad Nabeel Dar is the founder of GarbageWasteDisposal.com, where he researches and evaluates garbage disposals, kitchen sinks, dishwashers, and kitchen drain systems to help homeowners make confident buying decisions.
After analyzing 30+ garbage disposal models, multiple sink configurations, and a wide range of drain system components across brands like InSinkErator, Waste King, Moen, GE, Frigidaire, and KRAUS, he focuses on what actually matters: real-world performance, build quality, noise levels, installation ease, durability, and overall value.