
Garbage Disposal Wiring: Plug-In and Hardwired Guide
Garbage disposal wiring is either a 20-minute job or a call-an-electrician job depending on one thing: whether your kitchen already has a switched outlet under the sink.
If a switched, GFCI-protected outlet exists inside the sink cabinet, wiring a disposal means attaching a power cord and plugging it in. If no outlet exists, you are running new cable from the breaker panel, installing a switch, adding a GFCI outlet or breaker, and connecting everything before the disposal can turn on. That second scenario is real electrical work.
This guide covers both methods step by step, the electrical requirements that apply regardless of method, how to wire the switch and GFCI outlet together, and how to wire a dishwasher and disposal on the same circuit.
Electrical Requirements Before You Start
Confirm these before touching any wiring. Getting them wrong causes nuisance breaker trips, motor damage, or code violations.
Circuit sizing
A 1/2 HP disposal runs on a 15-amp circuit with 14 AWG wire. Anything 3/4 HP and above should be on a 20-amp circuit with 12 AWG wire. Using 14 AWG wire on a 20-amp breaker is a code violation regardless of the actual load. The wire gauge must match the breaker size. Our dedicated circuit guide covers the full sizing breakdown by motor HP.
GFCI protection
Required under NEC 2017 and all later editions for any receptacle within 6 feet of a kitchen sink. The under-sink disposal outlet is inches from the drain, so it falls squarely within the requirement. Either the outlet itself must be a GFCI receptacle, or the circuit must be protected by a GFCI breaker at the panel. Both methods satisfy code. Our GFCI requirement guide covers which NEC edition applies to your jurisdiction.
Switch control
The disposal must be controlled by an accessible switch, typically a wall switch near the sink. The switch interrupts only the hot wire. The neutral runs continuous from the panel to the disposal without interruption.
Grounding
Every garbage disposal must be grounded through a green or bare copper wire connected to the grounding screw inside the disposal’s wiring compartment. Missing or loose grounding is the most dangerous wiring mistake and the one most likely to create a shock hazard.
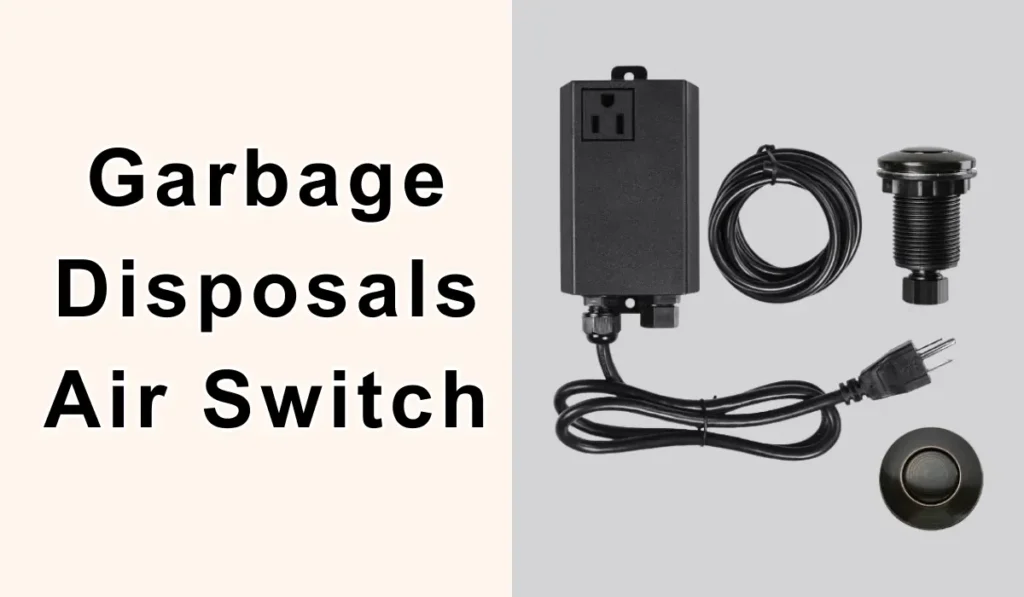
Method 1: Plug-In Garbage Disposal Wiring (Power Cord)
This is the simpler method. Most Waste King models ship with a power cord pre-installed. Most InSinkErator models ship without one and require you to purchase and attach a cord separately.
What you need: Appliance power cord (3-prong grounded), cord clamp, Phillips screwdriver, wire stripper, wire nuts, voltage tester.
Step 1: Kill the power
Turn off the breaker supplying the under-sink outlet. Verify power is off with a non-contact voltage tester at the outlet before touching anything.
Step 2: Open the wiring compartment
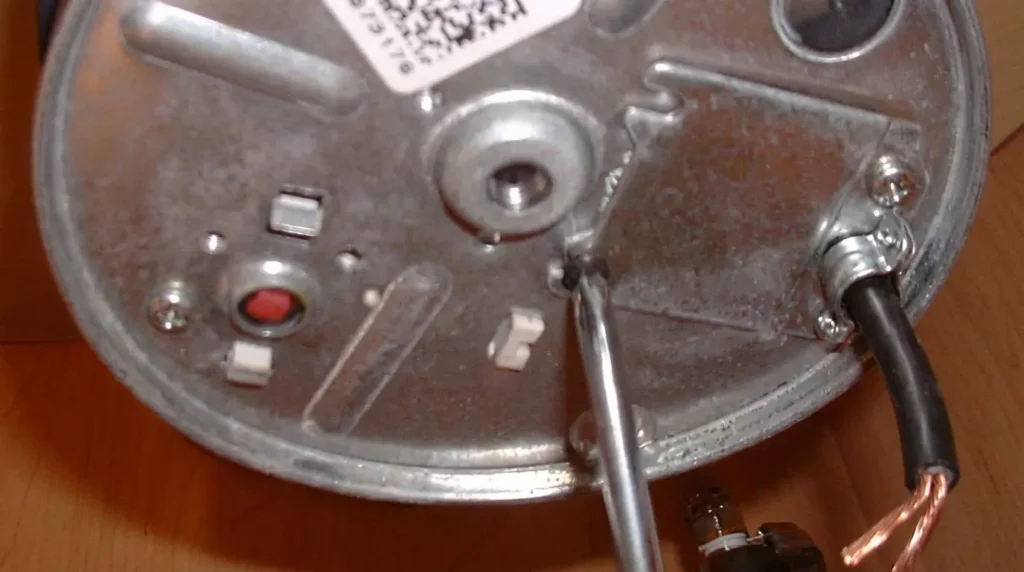
Flip the disposal over and find the small metal cover plate on the bottom. Remove the single screw holding it. Set the cover and screw aside.
Step 3: Install the cord clamp
Thread the cord clamp into the wiring hole on the compartment. Tighten the retaining nut from inside. This clamp prevents the cord from pulling loose from the connections under strain.
Step 4: Feed the cord through and strip the wires
Push the power cord through the clamp. If the cord wires are not pre-stripped, strip about 3/4 inch of insulation from each of the three conductors.
Step 5: Connect the wires
Inside the compartment you will see three leads from the disposal motor: black (hot), white (neutral), and green (ground). Connect black to black, white to white, and green to the green ground screw. Secure each splice with a wire nut. Tug gently on each connection to confirm it holds.
Step 6: Close and plug in
Tuck the wires into the compartment carefully. Do not pinch any insulation. Reinstall the cover plate. Plug the cord into the switched outlet under the sink. Restore power at the breaker. Run cold water and flip the wall switch to test.
If the disposal hums but does not spin, the electrical connection is fine but the grind plate needs freeing. If the disposal makes no sound at all, recheck every wire connection and verify the outlet has power.
Method 2: Hardwired Garbage Disposal Wiring
Hardwiring connects the disposal directly to the house wiring through a cable routed from a wall switch, without a plug or receptacle involved.
When hardwiring is required: No outlet exists inside the sink cabinet. Local code requires direct wiring rather than a receptacle. The disposal is on a dedicated circuit with no other outlets.
What you need: Electrical cable (12/2 or 14/2 NM-B depending on circuit), flexible metal conduit or BX cable, cable connector or Romex connector, wire nuts, screwdriver, voltage tester, wire strippers.
Step 1: Kill the power
Breaker off. Verify with a voltage tester. No exceptions.
Step 2: Open the wiring compartment
Same cover plate on the bottom of the disposal.
Step 3: Route the cable
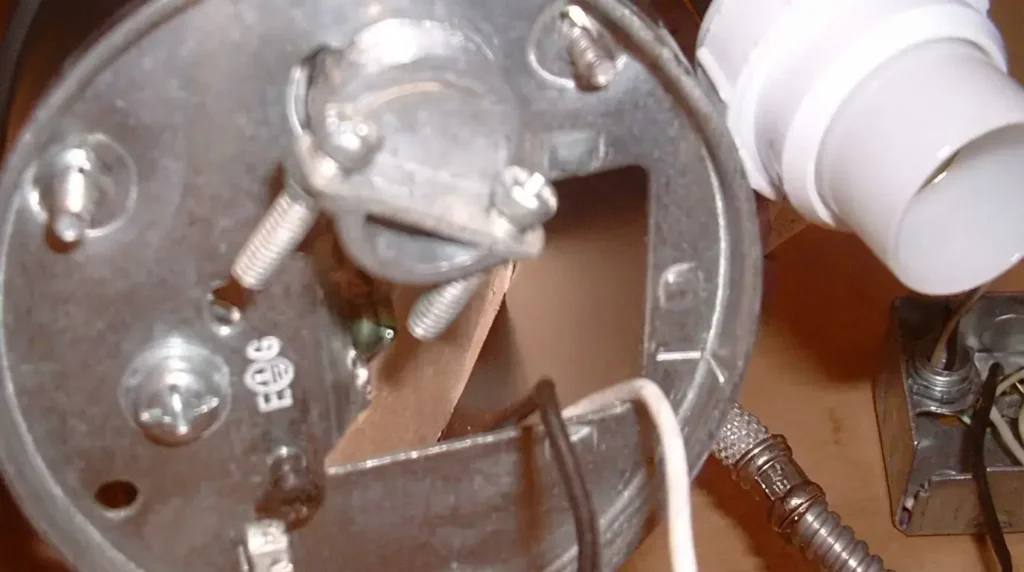
Feed the supply cable through approved conduit (flexible metal conduit or BX cable) into the wiring compartment. Secure it with a cable connector at the compartment opening. The connector prevents the cable from pulling free and protects against abrasion.
Step 4: Connect the wires
Black supply wire to black disposal lead. White supply wire to white disposal lead. Green or bare ground wire to the green grounding screw inside the compartment. Secure each connection with wire nuts.
Step 5: Wire through the wall switch
The hot wire from the panel goes to the switch first, not directly to the disposal. The switch output then runs to the disposal. Only the hot conductor passes through the switch. The neutral runs continuous from the panel through to the disposal without interruption. The ground connects at every junction: panel, switch box, and disposal.
Step 6: Close, restore, test
Tuck wires, reinstall cover, restore breaker power, run cold water, flip the switch.
For hardwired disposals, GFCI protection is provided by a GFCI circuit breaker at the panel since there is no receptacle for an outlet-type GFCI device.
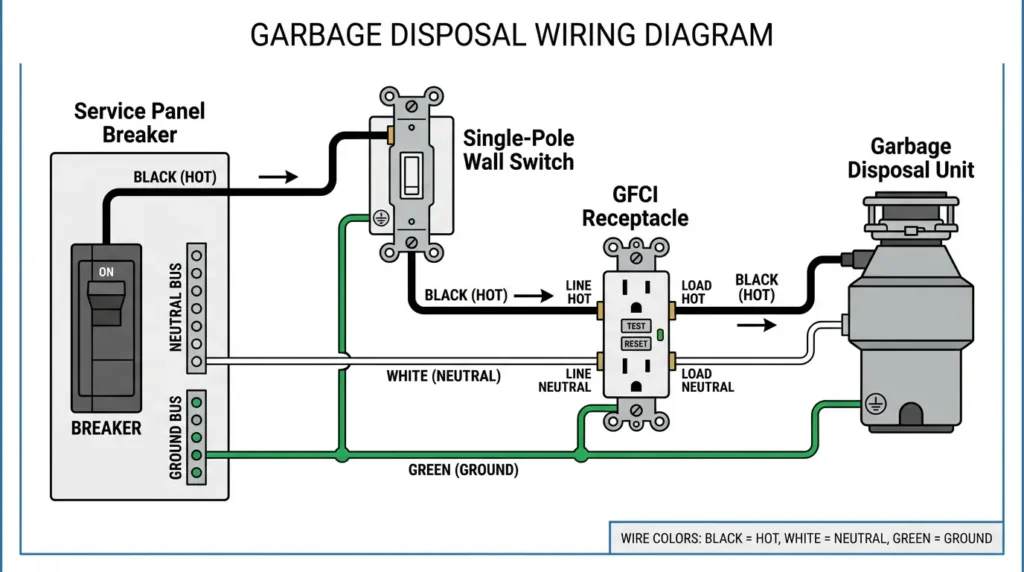
How to Wire a Garbage Disposal Switch and GFCI Outlet
This is the configuration most kitchens use: a wall switch controls a GFCI outlet under the sink, and the disposal plugs into that outlet.
Power flow
Panel breaker sends power to the wall switch box. The hot wire goes through the switch. From the switch, the hot wire runs to the GFCI outlet’s LINE hot terminal. The neutral from the panel goes to the GFCI outlet’s LINE neutral terminal. The ground connects at both the switch box and the outlet box.
At the GFCI outlet
Incoming power connects to the LINE terminals (marked on the outlet). If a dishwasher also plugs in under the sink, its outlet connects to the LOAD terminals of the GFCI, which extends ground fault protection downstream to the dishwasher outlet through a single GFCI device.
The switch controls the outlet
When you flip the wall switch off, the hot wire is interrupted and the outlet loses power. The disposal stops. When you flip the switch on, the outlet is energized and the disposal runs.
One important detail: the switch must be in a location accessible from the sink. Most codes require it within arm’s reach of the person operating the disposal. The most common placement is on the wall immediately above the countertop next to the sink.
How to Wire a Dishwasher and Garbage Disposal Together
Many kitchens share a single 20-amp circuit between the dishwasher and the garbage disposal. This is acceptable under most local codes because the two appliances rarely run at the same time.
The correct wiring
The GFCI outlet under the sink has two sets of terminals. LINE terminals receive the incoming power from the switch. LOAD terminals feed a second standard outlet for the dishwasher. Both outlets are protected by the single GFCI device.
The disposal plugs into the switched GFCI outlet. The dishwasher plugs into the unswitched downstream outlet. When you flip the disposal switch, only the disposal outlet turns off. The dishwasher outlet remains powered because the switch controls only the disposal’s LINE connection, not the full circuit.
Circuit requirements
20-amp breaker with 12 AWG wiring throughout. A 15-amp circuit is not acceptable for sharing between a dishwasher and a disposal. The combined startup draw can exceed 15 amps momentarily.
If the breaker trips when both appliances run simultaneously, the combined load exceeds the circuit capacity during startup overlap. In that case, a separate dedicated circuit for the disposal is the permanent fix.
What Size Wire for Garbage Disposal
| Circuit | Wire Gauge | Disposal Size |
|---|---|---|
| 15-amp | 14 AWG (copper) | 1/3 HP, 1/2 HP |
| 20-amp | 12 AWG (copper) | 3/4 HP, 1 HP |
Never use 14 AWG wire on a 20-amp breaker. The wire is not rated for that current and overheats under sustained load. If you are upgrading from a small disposal to a 3/4 HP or 1 HP unit, verify that the existing wire is 12 AWG before installing the larger breaker.
Common Garbage Disposal Wiring Mistakes
- No cord clamp on plug-in installations. The cord eventually pulls loose from the connections under the weight of the hanging cord and repeated vibration during operation. Always use the clamp.
- Ground wire left disconnected. The disposal works without the ground connected. But if a motor winding fails and energizes the metal housing, the ground is what prevents the sink and faucet from becoming shock hazards. Never skip grounding.
- LINE and LOAD reversed on the GFCI outlet. The outlet functions normally with reversed terminals, but the GFCI protection does not work. The outlet looks fine and tests fine with a lamp, but it will not trip on a ground fault. Always confirm incoming power goes to LINE.
- 14 AWG wire on a 20-amp breaker. A code violation that creates a fire risk under heavy or sustained load. Match wire gauge to breaker rating without exception.
- Switch wired on the neutral instead of the hot. The switch must interrupt the hot conductor only. A switch on the neutral leaves the disposal energized at the hot terminal even when the switch is off, which creates a shock hazard during service work.
When to Call a Licensed Electrician
Running new cable from the panel to the kitchen. Installing a new breaker. Working with aluminum wiring. Any situation where you are not 100% confident which wires are hot and which are neutral. Permit-required electrical work in your jurisdiction.
The plug-in cord method is straightforward DIY for anyone comfortable with basic wiring. The hardwired method involves working with house wiring that carries real risk if done incorrectly. If you have any doubt about the process, the electrician’s fee is cheaper than the consequences of a wiring mistake.
FAQ’s
The Author

Muhammad Nabeel Dar is the founder of GarbageWasteDisposal.com, where he researches and evaluates garbage disposals, kitchen sinks, dishwashers, and kitchen drain systems to help homeowners make confident buying decisions.
After analyzing 30+ garbage disposal models, multiple sink configurations, and a wide range of drain system components across brands like InSinkErator, Waste King, Moen, GE, Frigidaire, and KRAUS, he focuses on what actually matters: real-world performance, build quality, noise levels, installation ease, durability, and overall value.