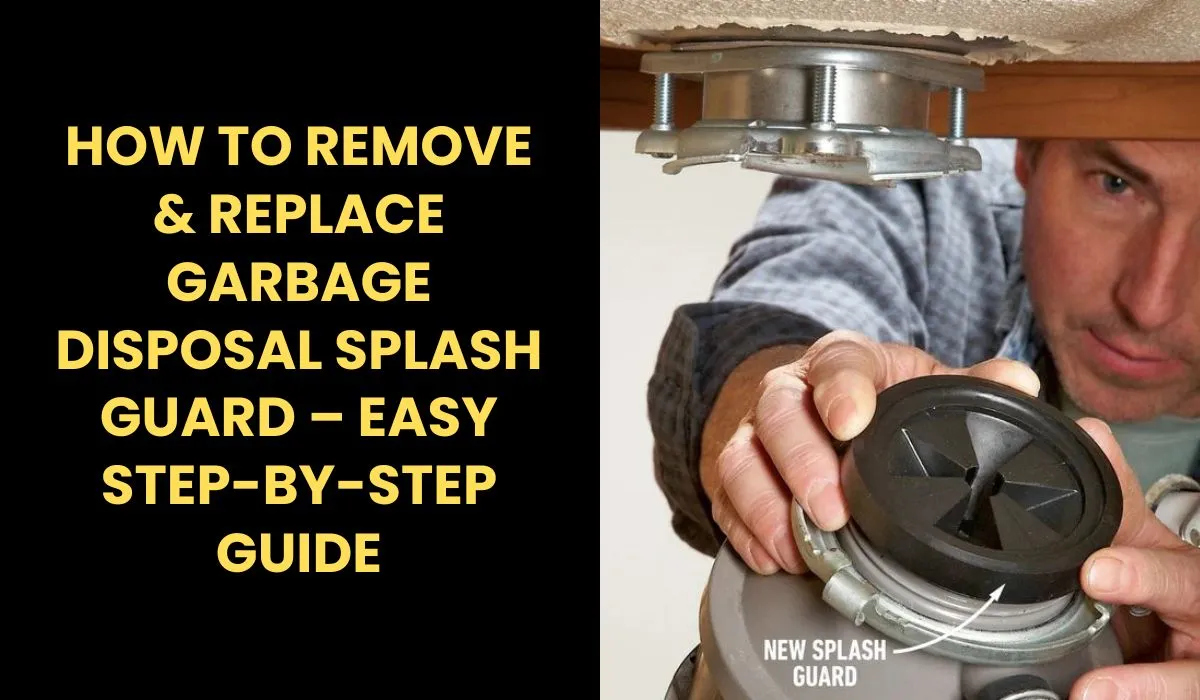
How to Remove and replace a Garbage Disposal Splash Guard
That rubber ring sitting in the drain opening of your garbage disposal is called a splash guard. It keeps water and food from spraying back up during grinding, traps noise, and directs scraps downward into the chamber. It also collects a layer of decomposing food on its underside that becomes the single worst source of disposal odor in most kitchens.
When the rubber cracks, stiffens, or tears, the guard stops doing its job. Water splashes up during grinding. Food particles escape the chamber. And no amount of scrubbing removes the embedded bacteria from rubber that has deteriorated after years of use. At that point, cleaning is not the fix. Replacing it is.
A new garbage disposal splash guard costs $5 to $10. The replacement process takes 30 seconds on removable models and about 20 to 30 minutes on fixed ones. Here is how to figure out which type you have and handle both.
Clean It or Replace It? How to Decide
A splash guard that is physically intact but dirty does not need replacing. Flip it up, scrub the underside with an old toothbrush and dish soap, rinse it, and you are done. Do this every two weeks and the guard stays functional for years.
Replace it when: the rubber is cracked or torn, the flaps have stiffened and no longer flex when you push food through, visible mold has embedded into the rubber that scrubbing cannot remove, or the guard has been in use for more than three years without ever being replaced. Deteriorated rubber cannot seal properly and no amount of cleaning restores flexibility to cracked material.
How to Tell Which Type of Splash Guard You Have
Look down into the drain. If you see rubber flaps sitting loosely in the opening, reach in and try lifting an edge gently. If it flexes upward and starts pulling free, you have a removable guard. If nothing moves at all, the guard is fixed underneath the mounting flange, and the disposal has to come off before you can reach it.
Quick brand guide:
Waste King, Moen, and InSinkErator Evolution models generally use removable splash guards that lift out from above. InSinkErator Badger models have fixed guards mounted beneath the flange assembly that require removal of the disposal unit.
Removing and Replacing a Removable Splash Guard

Power off at the wall switch. Unplug the disposal or flip the breaker for safety.
Reach into the drain opening and grip the inner edge of the rubber guard. Peel it upward from one side. It flexes easily because it is just rubber seated in a groove. Pull it completely out.
Before dropping the new one in, clean the rim of the drain opening with a soapy brush. Buildup collects under the old guard and you want the new one seating against a clean surface. Press the new splash guard into the opening and make sure it sits evenly all the way around with no gaps.
For InSinkErator Evolution models with the QuietCollar baffle: twist the collar counterclockwise to unlock, lift straight up. The replacement drops in and twists clockwise to lock.
Total time: under a minute. No tools, no plumbing.
Removing and Replacing a Fixed Splash Guard
This is the process for InSinkErator Badger series and any model where the guard sits beneath the mounting flange rather than in the drain opening.
Power off and unplug the disposal, or switch the breaker off if hardwired.
If a dishwasher hose connects to the disposal, loosen the hose clamp and pull the hose free. Place a bucket under the P-trap connection. Loosen the slip-joint nut on the discharge pipe and disconnect it. Water will spill.
Now the disposal needs to come down. Support it from below with one hand. Use a screwdriver inserted into the mounting lug on the locking ring, or use the wrench that came with the disposal, and rotate counterclockwise. The ring loosens and the unit drops.
Here is the trick that makes this easier: before you start turning the ring, stack a few thick books or a small piece of lumber under the disposal to support its weight. When the ring releases, the unit settles onto the stack instead of dropping onto your hand. Reinstalling is easier too because you shim the books up until the ring just touches the flange, then twist it locked without needing to hold 15 to 20 pounds overhead with one arm.
With the disposal down, the splash guard is visible inside the mounting flange. Pry the old guard out with a flathead screwdriver or pull it by hand. Clean the flange groove. Press the new guard into place until it seats evenly.
Remount the disposal by lifting it into position (or shimming up from below) and rotating the locking ring clockwise until it locks. Reconnect the discharge pipe and dishwasher hose. Restore power. Run water and test for leaks at every connection.
Total time: 20 to 30 minutes. If you have never removed your disposal before, knowing how the mounting system works makes the process less intimidating.
How to Measure for the Right Replacement
Most residential garbage disposal splash guards fit a standard 3.5 inch sink drain opening. That covers the vast majority of kitchen sinks in the US. Measure the drain opening across the inside diameter to confirm before ordering.
Do you need to buy the exact brand? Not always. Universal splash guards from hardware stores and Amazon fit most standard 3-bolt mount disposals. They cost $3 to $7 and work fine on Badger models, Waste King units, and many Moen disposals.
OEM replacements from InSinkErator, Waste King, or Moen cost $7 to $12 and are guaranteed to match the exact groove dimensions and flap thickness of your specific model. If you want a perfect fit without guessing, the OEM part is worth the extra few dollars.
The InSinkErator QuietCollar baffle is the exception. It is a model-specific part that locks into the Evolution series mount and is not interchangeable with standard splash guards. Order the InSinkErator QCB-AM if you need to replace one.
How to Clean a Garbage Disposal Splash Guard Without Removing It
If the guard is still in good shape and just needs cleaning, you do not have to pull it out every time.
Lift each flap with your fingers and scrub the underside with an old toothbrush dipped in dish soap. Get into the folds where food paste accumulates. Rinse with running water. This takes about two minutes.
For deeper cleaning, pour a tablespoon of baking soda onto the top of the guard and scrub it in with the brush. The baking soda acts as a mild abrasive and neutralizes odor. Rinse thoroughly.
On removable models, pulling the guard out and soaking it in a bowl of warm water with baking soda for ten minutes makes the scrubbing easier when buildup is heavy.
Regular cleaning every two weeks keeps the guard functional and odor-free for two to three years before replacement becomes necessary.
FAQ’s
The Author

Muhammad Nabeel Dar is the founder of GarbageWasteDisposal.com, where he researches and evaluates garbage disposals, kitchen sinks, dishwashers, and kitchen drain systems to help homeowners make confident buying decisions.
After analyzing 30+ garbage disposal models, multiple sink configurations, and a wide range of drain system components across brands like InSinkErator, Waste King, Moen, GE, Frigidaire, and KRAUS, he focuses on what actually matters: real-world performance, build quality, noise levels, installation ease, durability, and overall value.